Sunday, November 12, 2017

STEM Native American Homes

I wanted to be able to teach the standard of long ago vs. today without making vests and pilgrim hats.  Now if this is something you do, no judgement from me.  I just knew for me there was a better way.  We study Native American Homes, and how the region the Native Americans lived in, along with the natural resources available effected what kinds of homes they built.  In this unit, students get to build model homes of Long Houses, Adobe Homes and Chickees.

First, we read about the different types of homes, who built them, where those people lived etc.  This is a full color projectable book. 


There are 2 black and white mini-book options included in this pack, one for Kindergarten and one for 1st-2nd grade readers.


My favorite part of this unit however is the STEM component.  Students get to build model Native American homes.  

Long Houses

Teepees

Chickees
Have a wonderful Thanksgiving!

https://www.teacherspayteachers.com/Store/Kerry-Antilla
https://www.pinterest.com/eggman9091/
https://www.facebook.com/KerryAntillaTPT


Tuesday, March 21, 2017

All new Science Vocabulary Cards and TPT Gift Card Giveaway!!!

Hey everyone,

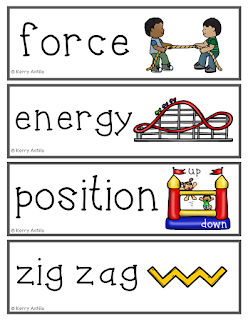
I have been working to update my science vocabulary cards.  I am so excited about them I wanted to do something kinda big to announce their new look!  Each day through Saturday, I will have a new giveaway or sale that I announce on my Facebook.  I am also running a TeachersPayTeachers gift card giveaway right here- details below.  Here is a sneak peak at my science vocabulary cards.


Enter below to win a $10 TeachersPayTeachers gift card!

a Rafflecopter giveaway
https://www.teacherspayteachers.com/Store/Kerry-Antilla
https://www.pinterest.com/eggman9091/
https://www.facebook.com/KerryAntillaTPT


Sunday, February 5, 2017

One Dog Canoe

One Dog Canoe was written by Mary Cassanova, and is a part of our reading series.  I love getting to teach this book!  If you haven't read it before, this girl and her dog go on a canoe ride, and all these animals keep joining them.  The repetitive text and predictable pattern makes it an enjoyable read for the kids.

I usually spent 3-4 days just on this book alone- it has great vocabulary, and a text that works well for retelling.  It also works really well in a compare and contrast with Jan Brett's The Mitten.

Day 1- We read the book, not stopping a whole bunch so the kids could appreciate the cadence of the story and just enjoy it all around.  I stopped only when there were vocabulary words that greatly hindered their understanding of the text.  I explained them briefly and moved on.  (We will spend a lot of time on those words in days to come).  We created a double bubble map to compare One Dog Canoe to the book The Mitten by Jan Brett.


Day 2- We read the book slower; taking time to talk about the vocabulary words and come up with our own definitions of them.  We made and anchor chart of these vocabulary words and their definitions.  I had the kids draw out one of the vocabulary words on a sticky note and adhere it to the chart, then as a class we developed definitions to go with each word.


Also on day 2, the students wrote a summary of the book.  They earned a sticker on their paper by using one or more of the vocabulary words in their summary.  

Day 3- We read the book again, this time with more of an emphasis on the details of the book.  Who got in the boat next?  We used a large canoe made of butcher paper and inserted the animals into the canoe as we read the story.  Students then were given the mini-book pages and required to put them into sequential order.  I love this mini-book because it is simple enough that when the students are finished putting it together the majority of the class is able to read the book.


Day 4- We read the book one final time.  (Although I have placed it in a bucket where they can read it on their own, I have a feeling it will get read a lot more.)  The students took a quick comprehension assessment about the book.

To grab these One Dog Canoe resources click any of the pictures on the page.

https://www.teacherspayteachers.com/Store/Kerry-Antilla
https://www.pinterest.com/eggman9091/
https://www.facebook.com/KerryAntillaTPT


Saturday, January 21, 2017

Maps- Dr. Seuss, 3D models and more

We have come to a unit that I absolutely love teaching, maps and geography! When we introduced maps it happened to be during Dr. Seuss week- cue in There's A Map in My Lap!  This book was a great introduction to maps and their many uses.  Some of the information was little bit over my students' heads (latitude and longitude for instance.)  For the most part those, the book was a great way to kick off learning about maps.

The students did an at home project and each created a different 3d building out of a box.  I used poster board to create parks and streets.  The students made the trees.


The students also created a follow the directions game for their classmates.  In this game students were given a blank zoo map from the The Mailbox Magazine.  They chose 4 places they would like to go on the map and numbered those places 1-4.  The students then wrote a paragraph about where they went on their zoo trip.  First, I went to see the lions, next I went to see the bears.  Students then put the map into an envelope, glued their paragraph to the front and students worked in pairs to read about different students' zoo trips.  The student pairs we given a laminated map and a dry erase marker to write the numbers on the map as they read the directions.  Once they marked all 4 locations, the students took out the map from the envelope to check their work.


I hope you got some new ideas on working with maps!  Enjoy!


https://www.teacherspayteachers.com/Store/Kerry-Antilla
https://www.pinterest.com/eggman9091/
https://www.facebook.com/KerryAntillaTPT


Monday, September 5, 2016

Making 5- Building a Strong Number Sense Foundation

To me, our math curriculum introduced ways to make 5 WAY TO EARLY.  I understand the reasoning though.  We want these students to be able to understand and manipulate numbers.   But I asked myself, "How do I get 2nd week of Kindergarten students to understand ways to make 5?"  So I have tried to teach this a few different ways over the years.  Last year I found a way to teach it that worked!!! We have just been through the second week of Kindergarten and I am proud to announce, my kiddos are well on their way to building a strong number sense foundation.

Day 1

Student supplies: 
  • red and yellow chip counters (5 per child)   
  • five frames (one per child)
Teacher supplies:
  • chart paper and marker
  • glue stick
  • large paper five frames (6) already glued onto the chart ahead of time
  • __   and  __ paper prompts (6) already glued onto the chart ahead of time
  • 1.5" red and yellow circles (I bought a circle punch at Michaels that makes circles this size)
Procedure:  I have students use their five frames and show all 5 boxes filled with red counters.  From there I glue 5 red counters into the first 5 frame.  Below that (in the __ and __ prompt) I write 5 red and 0 yellow.  Then I have the students flip ONLY one counter to make it yellow.  I create the frame for 4 and 1 on my chart paper.  I continue this process for the rest of the ways to make 5.  (Note: After you do 3 and 2 if you move to the right for 2 and 3 students who are ready for it will be able to see the addends reversed.) 


Day 2:  

Student Supplies:
  • five frames (one for each student)
  • red and yellow counters (5 for each student)
  • Making 5 mini-book
  • scissors
Teacher Supplies: 
  • Making 5 Anchor Chart (from the previous day)
  • Making 5 mini-book 
  • stapler
Procedure: 
  1. Have students place 5 red counters on the five frame.  Keep the chart in front of the group and ask the students to tell you how many reds and yellows they used to make 5.  Repeat this process for all the different combinations of 5.  
  2. Have students select 2 colors of crayons and color the apples on the Making 5 mini-book to show ways to make 5 that match each addition sentence.  (This mini-book is available with the word plus and the word and as alternatives to a plus sign.) 


Day 3:

Student supplies: 
  • red and yellow chip counters (5 per child)   
  • five frames (one per child)
  • Robot Making 5 Center
Teacher supplies:
  • Making 5 Anchor Chart
  • Robot Making 5 Center
Procedure:
  1. As a class review the anchor chart again, still with students being hands on with chips and five frames.
  2. Introduce the Robot Making 5 Center- in this center students will match 5 frames with robots of different colors to the making five expressions (either 4 and 1, 4 plus 1 or 4+1).  You can differentiate the making five expressions depending on your students.  Recording sheets also come with this center.  


Please join my link-up and share up to three resources for teaching beginning number sense.   
  

https://www.teacherspayteachers.com/Store/Kerry-Antilla
https://www.pinterest.com/eggman9091/
https://www.facebook.com/KerryAntillaTPT


Thursday, August 18, 2016

2016-2017 Classroom Pics

I've been working for the last two weeks on getting my classroom ready for the kiddos.  Tomorrow morning is meet and greet and I still have bins to put away and some thing to organize.  But here are pictures of my classroom so far.


Here is my word wall and writing center.  I love the banner look of the letters and the black against the blue.  On top of the writing center I have metal bins from Target with color words on them.  I put extra crayons in those so when a kid can't find a color, they can grab one from there.  The bin on the writing center is full of paper, stencils and picture dictionaries.  On the table itslef in binders are my science and social studies vocabulary cards.  I just put the card pages in plastic sleeves and the students can write about our current social studies or science topics.


On the left are numbers 1-20 and my book bins for Daily 5.  My Smart Board is in the middle and half of my calendar can be seen on the right.  I painted the calendar with magnetic primer and then a dark gray paint.  I covered up a kinds gross looking brown chalkboard.  My calendar (like a few other places in my classroom) is not finished yet.  More pictures to come!

Kerry


Wednesday, July 20, 2016

Kindergarten Dice Games All Year Long

A 5 Below just opened in my area. I found the coolest thing there. JUMBO DICE!!!!!!!!!!


There went my self control! But there are so many things you can do with dice ALL year long! So I convinced myself to grab a pair. Who knows, I may be back for more.

So here are some of the ways I plan to use these in my classroom this upcoming school year.

One of the biggest math concepts students will ever learn is an understanding of numbers; what they represent, and how to manipulate them. At the beginning of the year in Kindergarten I spend a lot of time making sure my students understand numbers. We do a lot of this with whole class games and then as the year goes on they also work on number sense a lot in math centers.

So picture this, it's the first week of school; there are procedures to teach, and students who can't focus for more than a minute at a time. So I take out one of the awesome dice. I have my class sit in a circle and we practice the procedure for the game. "We count the number on the top of the die and put our thumb in the air when we've counted it. No calling out, I want to make sure to give turns fairly." So then I watch; the kids who point to the dots and count them, the kids who are able to subitize already (look at a group of objects and know how many there are without counting.) I see some thumbs go up right away, I see others take their time. I keep a paper on a clipboard with each child's name. I watch and observe for a few rounds and then rate them 1-4 on how well they seem to be able to subitize. I vary the way I ask for the answer; I ask them to all whisper it to me (great way to make kiddos feel involved if there is not time to call one everyone, and let's be honest, there rarely is.) I have some students who seem to be struggling whisper in my ear, I have them all respond without talking and just putting up the right amount of fingers. My goal with this class game is muti-fold; teaching procedures, assessing who is a strong counter, who is able to subitize, and who is struggling with these concepts. We will play this game a lot; and I will from time to time explicitly talk about how I subitize (the number 3 on a die is always arranged the same way.)


When they get good at being able to subitize to 6 we bring in a second die. Kiddos start to do mental math as they look at a group of 3 dots on one and 2 dots on the other and create a group of 5. When we get a double I have them put their arms in the air and do a silent cheer. As the year goes on when we get a double we also talk about what happens when we add those two numbers together. One of the most challenging mathematical concepts for me to teach and my students to learn each year is comparing numbers. They need a lot of practice with the vocabulary and the concept. I bet you're thinking, hey, we could compare quantities with those new dice. :) I'm right there with ya! This will be very similar to the game at the beginning of the except we are using two dice and comparing. There are so many ways to simplify this or challenge your students with just two dice. 1. The teacher rolls 2 dice and ask the students which die has fewer, or more dots. 2. The teacher rolls one die and ask the students what numbers the other die would have to be to be fewer (or more). Then I would have students take turns rolling the second die until we came across a number we were looking for. (For example if I rolled a 4 and I asked for a quantity more than 4 the students would keep rolling until someone rolled a 5 or a 6. 3. The teachers rolls one die and have the students take turns rolling until they find the quantity one fewer and one more. I spoke briefly about addition a bit ago, but this is a great way to get the kiddos learning their addition facts fluently. For addition I would start off doing the game with them. For this game students all have a dry erase board and marker. I roll the two dice, students write the sum. As we get into addition more, students write the addition equation. Once a fair deal of my students are successful with writing the equations they get to do this as a center. (I remind them of how much I treasure these awesome dice and that they should not have pencil marks, or sticky hand prints on them.) Students will roll the dice and write the addition equation on their recording sheet.


And just when you thought, "I have to stop reading and get myself some dice, there's more. You can uses these for probability and graphing. The cool thing about rolling two dice is that statistically you will not roll a 2 or a 12 all that often. Your chances of rolling a 7 are far better. Once you have taught it, students can do this as a center on their own. They simply roll the two dice, find the sum and then color it in on their graph. They play until they have filled up one of the columns on the graph.


For these dice resources please click on any of the pictures above.

https://www.teacherspayteachers.com/Store/Kerry-Antilla
https://www.pinterest.com/eggman9091/
https://www.facebook.com/KerryAntillaTPT